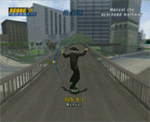
San Francisco Goals

Get A High Score: 50,000 Points
A single good combo will finish this easily. If you don't know about making combos read the tips page. The rest is just practice, try out combos all the time wherever you are. Gradually you'll get used to the moves needed and they'll become second nature to you.
Watch Video (335Kb)
Collect SKATE Letters
Painter Bob needs his SKATE letters back. Head down the walkway to the quarter-pipe, launch to the right for the S and land on the lower level. Head across the courtyard and grind the curved steps for the K. Carry on in the same direction towards the warehouse, go up the quarter-pipe at its base for the A and land yourself on the roof. Turn around to the left and ollie the gap onto the next roof. Jump toward the lamp post and grind the electrical wire for the T. Jump down onto the roof and roll across to the other side, jump and grind the right side of the building opposite. Jump off when you can reach the E.
Watch Video (1.11MB)
Collect COMBO Letters
Grind the wall and hop over each of the intersections. The final O is on the same line but after the curve to the left. If you miss the grind on it use a Manual and swerve yourself around to the left to get back onto the wall. Land it once you've got all the letters and you're done.
Watch Video (474Kb)

Find The Messengers 5 Missing Packages
The 5 packages are in a fairly apparent line that follow the fronts of the buildings along the road. Firstly cross the road from the starting point and transfer across the gap between the quarter-pipes. Head down the road to where the pier starts, the second package is on the quarter-pipes with a red top here. Go under the porch with all the white columns and grind on the brown building's ledge. Hop the gap for the package and grind the other side. Head down the road in a straight line, do the same thing on the next 2 buildings for the last two packages.
Watch Video (782Kb)
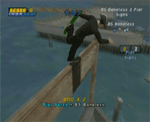
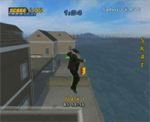
BS Boneless The 3 Pier Signs
There are 3 of these big wooden signs around the pier, you need to do a lip trick on them called the BS Boneless. The first sign is right in front of you when you start. The other 2 are on the other side of the pier, you can either go the long way around or grind the wire across.
Watch Video (903Kb)
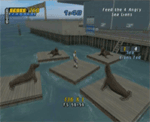
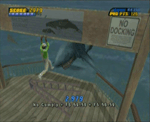
Feed The 4 Angry Sea Lions
You'll notice there are 4 fishermen around the pier doing what they do best. Behind each one is a bench with their box on it. Grind on the bench and they'll turn around to approach it, while they're at the bench grind across the rail where they were fishing from. This causes their fish to drop into the water and distract a sea lion. Do this for all four.
Watch Video (307Kb)
Manual The Overhead Walkway
Ride along the walkway until you reach the first set of cones. Get into a Manual and hold it until you reach the next cones. Not too difficult, be sure that you're holding down the ollie button to maintain a good speed.
Watch Video (395Kb)
Beat Muska's 3 Best Combos
Chad Muska's got 3 combos in a row for you to beat, luckily they're all low scores. Shuffle through modifiers when you're in a Manual or during a grind and these will be easy.
Watch Video (821Kb)
Darkslide The Waterside Railing
The Darkslide is a special kind of grind, fill up your special meter with normal tricks or the grind won't work. Do the Darkslide on the railing across the waterfront then jump back onto the floor.
Watch Video (405Kb)
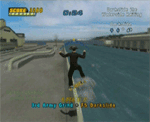
Medal The Competition
You need to place 3rd or higher to complete this goal, concentrate on scoring as many points as you can through good combos. Read the tips page for building combos. The setup of this competition is a little awkward, but you can get good scores by generally using the ramps at the ends for vert tricks and using the wall to grind between them.
Watch Video (1.01MB)
Get A Pro Score: 100,000 Points
Score 100,000 points within two minutes. Again you'll need to make combos for this to happen. You should be able to do it in one combo if you're good at them, if you're not you should aim for that kind of standard at the least.
Watch Video (641Kb)
Save Painter Neal
Painter Neal's busy decorating a sign on a piece of decking that juts out over the water. If you talk to him he tells you grind the birdshit off the rail around him. Do this and guess what... yep shark attack. You'll find yourself back up where Painter Bob is. One of the stone spheres now has a wire around it, grind the wire and let the unlikely physics do the rest.
Step 1 Video (628Kb)
Step 2 Video (324Kb)
Race The Bike Messenger
Head to the corner and Skitch on a car, stay on until you're at the other end of the road by the warehouse. Go through the orange arrow which is a waypoint and head back to where you started. Use the low wall to grind on to speed things up.
Watch Video (1.02MB)
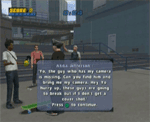
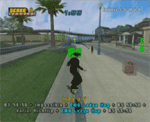
Race To Get The Camera
First you need to meet a guy down by the warehouses, follow the red arrow for your general direction. Time is ticking so grind as much stuff as you can for speed. Turns out he got mugged and a different guy has the camera up by the bus shelter so follow the red arrow back up the road. An option is to use the concrete slopes to get up onto the electrical wires for grinding, you can do this both ways. Now we need film, swerve around hard to the left and head to the plaza. The film is outside the Nokia shop, grind along the benches to get it. Lastly head back to the photographer guy on the pier. Time isn't that tight, as long as you use some good grinding you should finish with over ten seconds left on the clock.
Watch Video (2.04MB)
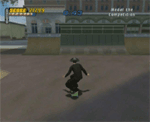
Manual, Gap And Manual The Setup
This one's fun, and kind of tricky if you're not too adept with the controls. Ollie onto the wooden ramp setup and land it in a Manual. Ride along until you come to the gap between the concrete ledges, ollie the gap and land in a Manual on the other side. Now just ride it to the other end. Make sure you're holding down the ollie button while you're in the manuals for speed.
Watch Video (314Kb)
Nail The Tricks They Yell Out
The easiest way of doing this is to get next to the ledge and ride parallel to it, this way you don't have to worry about your direction. For each trick listed you have to ollie, do the trick and land in a grind on the ledge. Alternatively you can go from a grind on the ledge, ollie into the trick and land on the ground. This is called tricking in and tricking out respectively.
Watch Video (2.09MB)
San Francisco Pro Goals

Kareem Campbell (Pro Specific Challenge)
Step 1: Go back and forth jumping the roof gap, while over the gap do the trick listed.
Step 2: Same again, but land in a Manual on the other side and jump to do the other trick. You can also use the pipe.
Step 3: Repeat step 2 but include more tricks.
Watch Video (431Kb)
Watch Video (373Kb)
Watch Video (281Kb)
Andrew Reynolds (Pro Specific Challenge)
This one's reasonably easy, there are 5 steps which involve jumping a gap. For each you'll need to clear the gap, Double Kickflip the gap and lastly Triple Heelflip the gap.
Step 1: Use the kicker ramp to jump over the water and land on the other side. Grind the rail for speed if you have trouble, but it's easy enough without.
Step 2: Use the quarter-pipe in the corner to build up speed, launch from the kicker over the walkway.
Step 3: Grind both rails to pick up speed and use the kicker to jump the fountain.
Step 4: Grind the bannister on your left, use the kicker to jump over the road and into the bowl. Use a Boneless ollie for more air.
Step 5: Jump the roof gap and turn right. Launch from the kicker over the road.
Step 1 Video (181Kb)
Step 2 Video (264Kb)
Step 3 Video (216Kb)
Step 4 Video (235Kb)
Step 5 Video (287Kb)

Get A Sick Score: 300,000 Points
Score 300,000 points anywhere in the level within 2 minutes. See the tips page for clues on stringing good combos together.
Watch Video (1.04MB)
Collect Pro COMBO Letters
Use the stone slope to get up onto the left hand electrical wire for the C, hop back and forth between the wires for the O and M. Jump down to ground level and Manual towards the B, use the quarter-pipe to launch up straight and get it. Land in a Revert to a Manual, turn right and head for the last O.
Watch Video (804Kb)
Manual The Pad In Both Directions
You'll notice one side of the 'pad' is straight and the other has notches in it. Use the flat side. Jump into a Manual on the pad and ride it to the end. Jump to another Manual along the ground and use the quarter-pipe to launch straight up. Land in a Manual to a Revert and do the same across the pad in the opposite direction.
Watch Video (504Kb)
Do The Spine Transfer Transfer
Use the quarter-pipe in front of you to get down to the lower level. This will give you good speed to approach the ramp, launch at a sharp angle to the left across the gap. As you're in the air pull off a Spine-Transfer to land on the wooden ramp the other side.
Watch Video (285Kb)
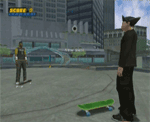
Grind The Blockers Off The Ledges
Over on the wall under the bridge there's a red button. Wallride over the button to set off the alarm. The officer will run down to turn it off, leaving the way open for you to grind the blockers. Use the quarter-pipe just across from the button to launch up onto the upper area. Grind down the wall on one side of the steps, slow yourself at the bottom then grind your way up the other side. You'll have to be fairly quick about it because the officer is sprinting his guts out to get back.
Watch Video (762Kb)
Next level: Alcatraz >>>